The “DeBruyn” Filter Re-visited With Construction Instructions
By Ken Normandin
With material originally written by Henri DeBruyn
In around September of 1999, Henri DeBruyn approached members of the Suncoast Killifish Society with a new type of filter he developed based on observations he had made while collecting in several locations, including the United States and Africa. Henri had observed that in nature, the water conditions in which the fish lived had changed very little or gradually over time. Additionally, he had noted that in most cases the water had flowed over some type of rocks or gravel, where much of the filtration and aeration had taken place. As a result of these observations, Henri developed a filter that approximated these conditions and had been using them in his fish room in Belgium. He brought back examples of these for testing by the club. I began using them at this time and have since converted my entire fish room to this filter system with some modifications which I will describe later in this article.
Before I go further, let me recap Henri’s design of the basic filter. Included will be the list of tools, materials and basic construction features, as well as some of the advantages and disadvantages of this type of filter. Also included are Henri’s observations made while on his collecting trips of habitats and water conditions that led him to design this filter.
Essentially, this filter is basically of a wet/dry type of design, having all the elements of such. Those elements are:
- A method of water delivery to the filter.
- Dispersion of the water over a filter media material (lava rock in this case).
- A collecting sump for storing water waiting to be re-circulated to the tank.
- A method for returning the water to the aquarium.
The major differences between this filter and conventional wet/dry systems are that the entire system is self contained and sits on top of the aquarium for which it is being used. Additionally, the system is air driven and the water merely drips from the filter back into the tank after filtration has taken place.
According to Henri, on his numerous collecting trips he came to the conclusion that “water changes are not that natural”, but instead observed that even in water holes that dried out conditions changed very slowly. “In all habitats I was able to see that water surface is large in relation to the quantity of fish and the water is highly oxygenated at the surface or by continuous flow over rock and gravel.” Henri cited high oxygen content as the single most important factor in good quality care of killies. His stress on this led to his belief that biological filtration inside the aquarium takes oxygen away from the fish and reduces their health to a degree. With this concept in mind he began to consider other options for filtration. Hence, his wet/dry filter design.
Materials: Most of these can be purchased from your local hardware chains.

- Vinyl Gutter – This is used for the main body of the filter. 10 foot lengths of “Tufflo” PVC gutter material can be purchased at several hardware stores.
- Vinyl Siding – this is cut and used for forming the sides of the filters. One piece of siding can be used for several filters. In fact, you will have plenty of leftovers……
- PVC Drywall Corner Material – This is originally used for drywall corner applications. It is heavily perforated and makes a perfect center diffuser for the water entering the filter.
- PVC or Plastic Soffit Vent Material – This comes in two sizes, approximately 3″ and 1 ½”. This is used in the base of the filter as the spacer to hold the media and provide a space for water to flow through and exit the filter. This is also used for the under gravel modification that I have developed.
- 7/16″ Clear Plastic Rigid Tubing – This can be purchased at your local fish store and is used as the main lift tube for the filter. Note – This refers to the inside diameter of the tubing. The actual outside diameter will be approximately ½”.
- ½” Clear Plastic Rigid Tubing – This is used as the lift tube from the under gravel unit and will slip over the lift tube for the main filter.
- 3/16″ Clear Plastic Rigid Tubing – This is used as the air supply line for the filter.
- Plastic Soda Bottle Cap – Used at the top of the air supply tube to direct water into the diffuser.
- Lava Rock – The basic filter media. Approximately 25 pound bags can be purchased at the local hardware store.
- PVC Cement
- ½” Adhesive Backed Foam Weather Strip: Used to create a barrier at the back of the filter (particularly with “critter keeper” type tanks) to close the gap between filter body and tank wall.
- Foam Sponge or Pond Filter Pad Material – Used as the pre-filter at the base of the lift tube. Later modifications (by me) have discarded this item in favor of an under-gravel inlet which will be discussed later in this article.
Tools and Equipment:

- Tape Measure
- Ruler
- Fabric Tape Measure – Great for drawing lines around gutter material. I have since designed a “template” for making these lines (as shown above)
- Portable Jig Saw – for all cuts made to filter body.
- Portable Hand Drill
- Aviation Snips or Heavy Duty Scissors
- Heavy Duty Postal Type Rubber Bands – these are the “clamps” that hold the filter together while the glue sets.
- Sharpie or other suitable marker.
- ½” Wood Cutting Drill Bit
- 3/16″ All-Purpose Drill Bit
- ½” and 9/16″ gasket punches (optional)
- Awl for punching hole in bottle cap (optional)
Construction Steps – This is the step-by-step for the actual construction of the DeBruyn Filter. For my demonstration, I am making a filter to fit a “Small” (1 gallon) critter keeper, but you can change this simply by using your own tank dimensions:
- Make all measurements on the PVC Gutter material for the following filter dimensions:
- Outside length – Mark these dimensions at several points around the gutter.
- Inside length (the part that fits inside the tank).
- “Tracks” – these are where the vinyl sides will fit into the filter body. These should be approximately ¼” from the inside length markings.
- Depth – This is the amount of filter that will actually be inside the tank. I usually set this at 1″. This measurement is taken by setting the gutter on a flat surface and measuring up vertically from the surface along the body of the gutter material.


- Using the fabric measuring tape or template, carefully draw out the lines around the gutter for the outside and inside of the filter body, as well as the depth. Cut the “tracks” for the side panels and then cut the outside length of the filter body.

- Using the snips or heavy duty scissors, cut along the line for the depth and cut out notches along the inside dimension of the filter. The notches will help in using the jigsaw to cut the inside dimension. Cut the inside dimension of the filter. After completing the inside dimension cut, do a quick check of the fit inside your tank. The fit should have a little play, not more than 1/8″ or so.


- Make a template for your side pieces by using a small piece of gutter material and carefully tracing along the inside wall of the gutter onto your template material. I use a piece of the same vinyl siding that will be used to make the actual side pieces. Try to make the template fit as closely as possible inside the gutter as this will make gluing the side pieces much easier. Carefully draw and cut out the side pieces for the filter.

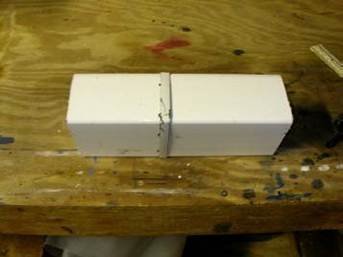
- Insert the side pieces into the “tracks”. Using rubber bands, clamp the side pieces in position as shown below. When rubber bands are in place, glue the side pieces in place on the outside of the filter body. The PVC cement will penetrate the joint sufficiently enough to seal it.


- While the glue sets for the side pieces, cut the filter block to size or make your under gravel plate. The filter block should be approximately 2 inches long and roughly 1 inch wide. Cut a central slit in the filter block and widen the hole with a piece of tubing to the width of the pick up tube. If making the under gravel plate, complete the following steps: a. Cut the plastic strip in lengths big enough to fit the inside of the soffit material you are using to make the plate.
- Cut the soffit material to size you need for tank bottom (I use 6″ for large critter keepers, 8″ for 10 gallon tanks).
- Glue the end pieces into the soffit material. This will support the weight of the gravel on the plate.
- When the glue has set, punch the hole in the plate to hold the lift tube.


- Cut the lift tube to length (usually 2 ½”). Cut two “V” notches in the bottom of the lift tube to allow water flow upwards.
- Insert the lift tube into the punched hole. The under gravel plate is complete.


- Also, while the glue sets, measure and cut the following pieces – the inner bottom plate and the water diffuser. The bottom plate can fit loosely inside the bottom of the filter, but the diffuser must fit snugly against the two side pieces.


- Once the inside pieces are cut and the glue has set, mark and drill the holes in the bottom of the filter. Also, mark and punch/drill the holes in the bottom plate and the diffuser. Be careful that the holes for the bottom plate and diffuser match up as closely as possible with the hole in the filter bottom so there is as little gap as possible.
- Cut the lift tube for the filter to length. The length of the tube should be from the height of the diffuser to approximately 1″ from the bottom of the tank. Slide the lift tube through the hole in the diffuser and place the lift tube bottom through the holes in the bottom plate and the bottom of the filter. Place the diffuser in position, clamp and glue the diffuser in place as well as the lift tube at the diffuser and the tube/bottom joint. This will prevent the lift tube from slipping out of the holes.

- While the glue sets, punch the hole in the bottle cap for the air tube. Also, cut the air tube to size. This should be approximately 1 ½” above the diffuser to approximately 1″ above the bottom of the lift tube. Cut the air tubing at a diagonal angle, this will allow for easier air hose attachments at the top and will direct the air flow upwards easier in the lift tube.
- Cut the foam piece for the back of the filter to fit the area between the cut outs. I have illustrated this area by a dotted line. Attach the foam piece at the line illustrated. This will prevent a gap at the back of the filter where it meets the rounded corners of the “critter keeper” type tank. Note – This piece is not required on conventional glass tanks.
- After the glue has set, put in your substrate (lava rock). Ensure it is packed in there relatively tightly and not able to rattle around in the filter. Remember, the more substrate you have, the better the filtration. Try to use lava rock approximately 1″ in diameter or less, but no smaller than ½” in diameter if possible. Larger lava rock pieces can be broken relatively easily with a hammer or even a large rock if a hammer isn’t handy…… Place your air tube assembly in the lift tube and attach your preference of bottom filter attachment (foam block or under gravel plate). Install your finished filter in your tank. Congratulations, you’ve finished your first “DeBruyn” filter!!
Now that we’ve completed our filter, let’s discuss the advantages and disadvantages of using such. There are several advantages to using this filter, many of which were outlined by Henri, including the following:
- Cleans the water from biological waste from the tank.
- No impact on water hardness.
- Provides highly oxygenated water (approximately 30% higher as tested by Charlie Nunziata).
- Needs no additional maintenance once bacteria are established.
- The entire system is air driven, nothing else is required.
- Overfeeding is not dangerous since leftover food goes into the filter and feeds the bacteria.
- Automatic drip system is available to adapt new fish gradually to your water.
In addition to these advantages outlined by Henri, these are some observations that I have made that I would also consider to be advantages to this type of filter:
- Water evaporation while filter is in operation causes two effects: First, a lowering of water level which requires periodic addition of water. This provides for a renewal of water that will satisfy those who prefer “water changes”. Secondly, the evaporation of the water provides for a small amount of “evaporative cooling”. This is of particular interest to those living in warmer climates, but I believe to be universally beneficial. This cooling amounts to about 2-5 degrees F., depending on amount of water flow. Note – Water evaporation is listed as a “disadvantage” by Henri, see number 2 in disadvantages below.
The disadvantages of these filters as described by Henri are as follows:
- Does not eliminate uric acids released by the fish in their waste.
- Water movement causes more evaporation – requires refills more often, use rain or R/O water.
- The resulting mud from bacterial action concentrates on tank bottom – needs removal (the mud is inert waste and does not affect water quality – it’s just unsightly….)
- The pH does lower gradually over time – Henri uses sodium bicarbonate to buffer the system. I believe this is rectified by the “biotope” setup on top of the tanks. Also, calcium, etc. tends to collect in the filter substrate over time which I believe takes over the job of buffering the water in a well-established filter system.
Additionally, I have found some other things that I would call disadvantages to this type of system:
- They do tend to be a bit messy. Since the operation requires water flowing up and splashing over substrate, the areas around the filter tend to get some splashing over (onto walls, other tanks, etc.). This can lead to discoloration (water stains) and calcium buildup on items.
- While they do a great job of filtration, aeration, etc., if they are inoperable for a considerable period of time (via power loss, water level too low for lift) the water quality inside the tank will degenerate (crash) and require considerable water changes. Experience has shown this time limit to be about 2-3 days.
- Also, since they do such a good job of filtration, they can lead you into bad feeding habits – primarily overfeeding – which can cause a buildup of nitrogenous wastes inside the tank. This can lead to rather large algae blooms as the water is too nutrient rich and any plants inside the tank can’t use it all….
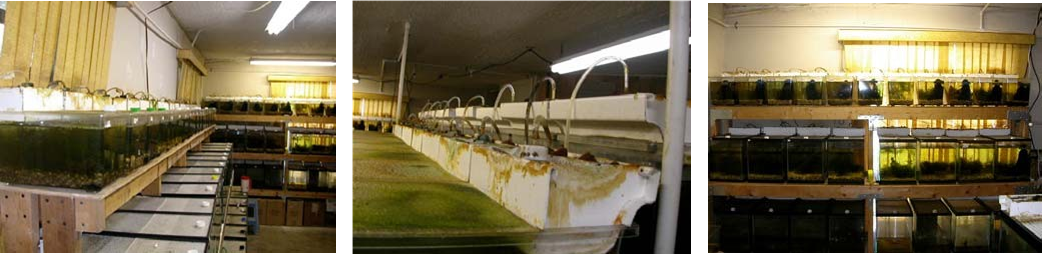
Ok, I think I’ve described everything the best I can. In summary, I believe this filter system is one of the best and most natural ways of providing filtration and care for your fish. Although they require some shop skills and know-how to produce in numbers, these filters are of great benefit to your fish and can be a great help in your efforts to keep and breed many of the more difficult species to breed. Below are a few pictures of my fishroom with the “DeBruyn” filters in use.